최근 cloud 환경에서도 GPU를 사용하고자하는 노력이 많아지면서 호스트의 개입없이 Guest VM이 직접 GPU를 할당받아 사용할 수 있는 passthrough 기술이 도입되었다. 본 글에서는 Ubuntu 18.04/20.04 버전에서 KVM을 이용해 passthrough를 설정하는 방법에 대해 기술한다.
하드웨어 기술
필요한 하드웨어 기술은 다음과 같다. 필자는 Intel CPU를 사용한다.
VT-x, VT-d: Enable
위 두 기술은 BIOS에 진입하여 Enable 해야 한다.
GRUB 수정
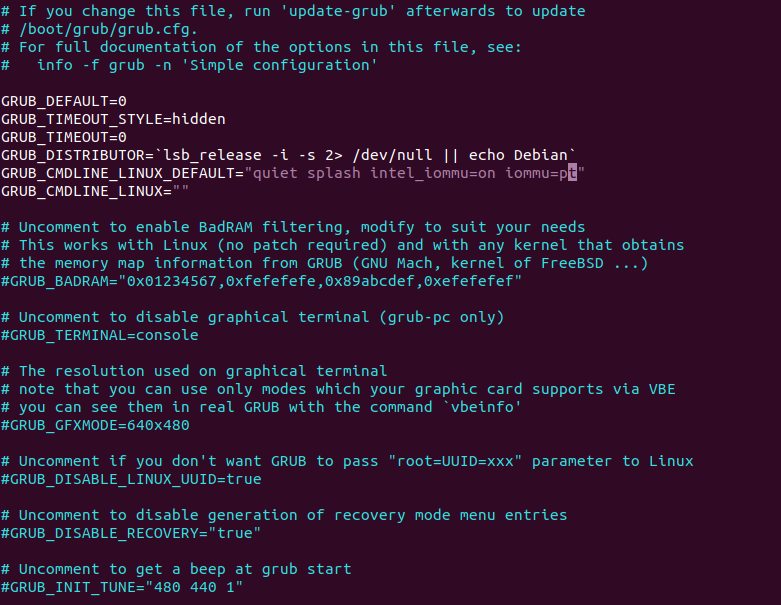
$sudo vim /etc/default/grub
intel_iommu=on iommu=pt 추가
GRUB_CMDLINE_LINUX_DEFAULT="quiet splash intel_iommu=on iommu=pt"

$sudo update-grub
$sudo reboot
커널 모듈 설정
$sudo lspci -nn | grep -i intel

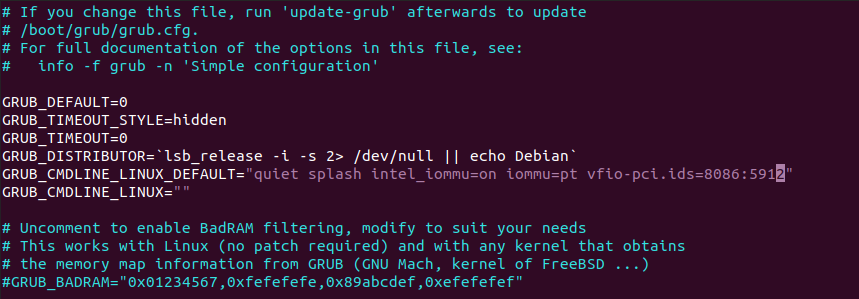
$sudo vim /etc/default/grub
vfio-pci.ids=8086:5912 [passthrough 하고 싶은 device의 ID 추가]
GRUB_CMDLINE_LINUX_DEFAULT="quiet splash intel_iommu=on iommu=pt vfio-pci.ids=8086:5912"

$sudo update-grub
$sudo reboot
설정 확인
$sudo dmesg | grep -i vfio

$sudo lspci -k

호스트 머신에서 passthrough로 설정한 device가 vfio-pci로 잡혀있으면 성공한 것이다.
KVM 설정
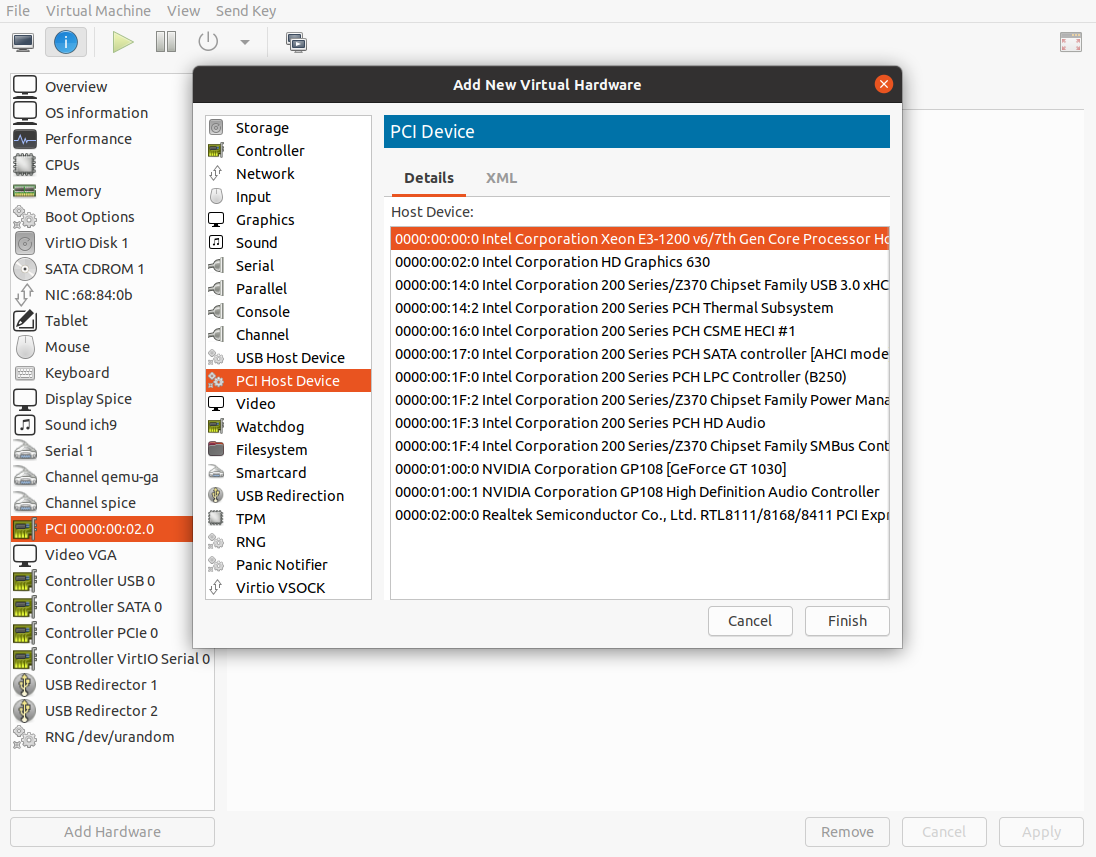
본 포스팅에서는 Intel Integrated GPU를 VM이 passthrough를 이용해 접근할 것이다.
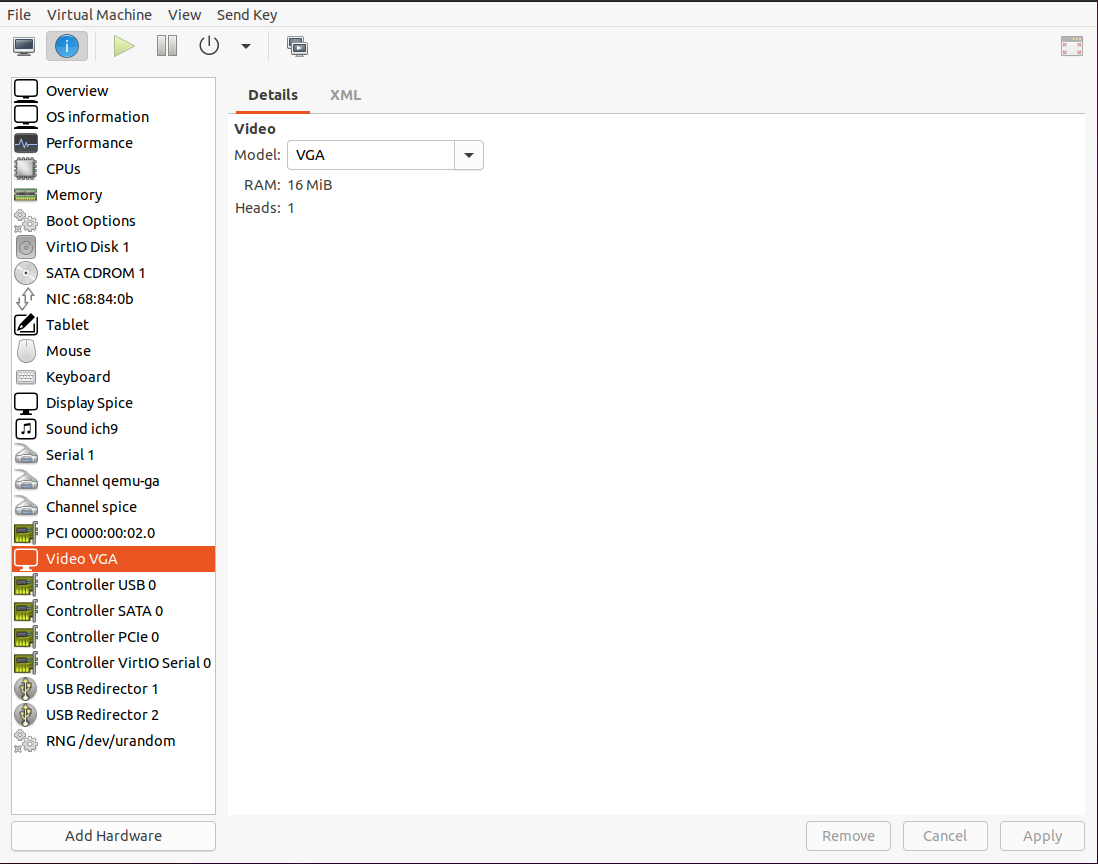
따라서 Video -> VGA를 반드시 선택하자
VGA를 선택하지 않는다면 graphic crash가 발생할 수 있다.

Add Hardware -> PCI Host Device -> passthrough를 원하는 Device를 선택한다.
이후 성공적으로 VM에서 passthrough를 사용하여 iGPU에 접근할 수 있다.

'ETC...' 카테고리의 다른 글
| [Ubuntu 20.04] Router setup using the KVM (0) | 2021.02.04 |
|---|---|
| [Ubuntu 20.04] How to install KVM(Kernel-based Virtual Machine) (0) | 2021.01.31 |
| [Ubuntu 18.04/20.04] How to install intel-OpenCL on Ubuntu 18.04 (0) | 2020.10.27 |
| [Ubuntu] Nvidia Nsight compute usage (0) | 2020.06.10 |
| [Ubuntu 18.04] How to install xrdp, xmate on Ubuntu 18.04 LTS with Nvidia graphic card (1) | 2020.02.21 |
